Home
Home Posts
Posts Categories
 Archive
 Contact
Simple blog with ProcessWire
I offer my blog solution for ProcessWire which works exclusively based on some template files. If you a not nerd stop reading here. Instead, install ProcessWire from the scratch by using my site profile which I offer here.
Note
The following templates stores the content in a variable ($content) which is processed in _main.php. This is usually the case if you install ProcessWire with profile Default (Intermediate Edition), Multi-Language or Regular Uikit. If you use a different method, you have to edit all files except _simple-blog-func.php.
Download the files
The download is available at the end of this page.
Upload the files
Extract all files and upload the PHP-files into site/templates/. Upload the CSS-file into site/templates/styles/ or another directory you prefer for CSS-files. Please note that you have to link this CSS-file in your markup (_main.php) by yourself.
Install the templates
Go to Setup->Templates and click "Add New".
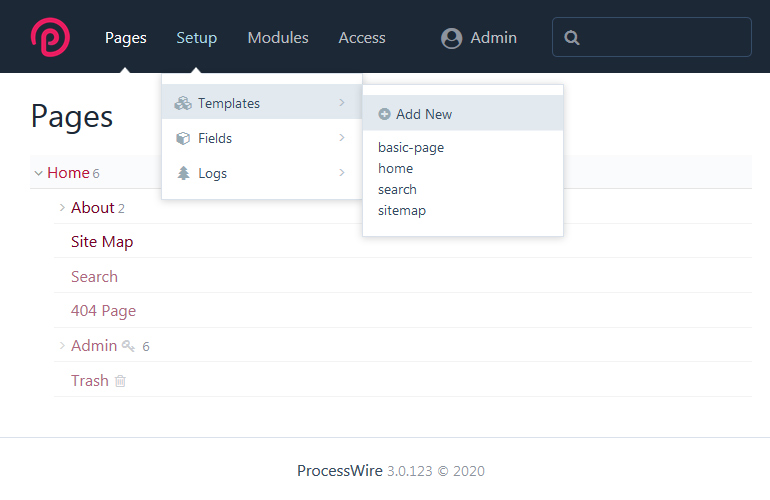 Now you will see a list of the files (except
 _simple-blog-func.php) you just uploaded into site/templates/. Set the checkmark on every file and click on "Duplicate fields used by another template". In the list below choose "home". Now click on "Add Templates".
Create the Posts-page
Go to the "Pages". Moving the cursor over the page name (e.g. "Home") will bring up some options. Click on "New".
 Select as template "simple-blog-posts", enter a title e.g.: "Posts" and click "Save". On the next page click "Publish".

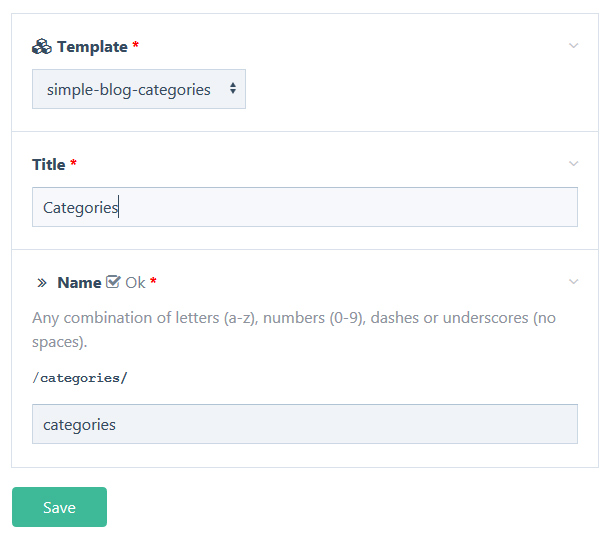
Create the Categories-page
Go back to the "Pages". Move the cursor over the page name (e.g. "Home") and click on "New". Select as template "simple-blog-categories", enter a title e.g.: "Categories" and click "Save". On the next page click "Publish".
Create the Archive-page
Go back to the "Pages". Move the cursor over the page name (e.g. "Home") and click on "New". Select as template "simple-blog-archive", enter a title e.g.: "Archive" and click "Save". On the next page click "Publish".

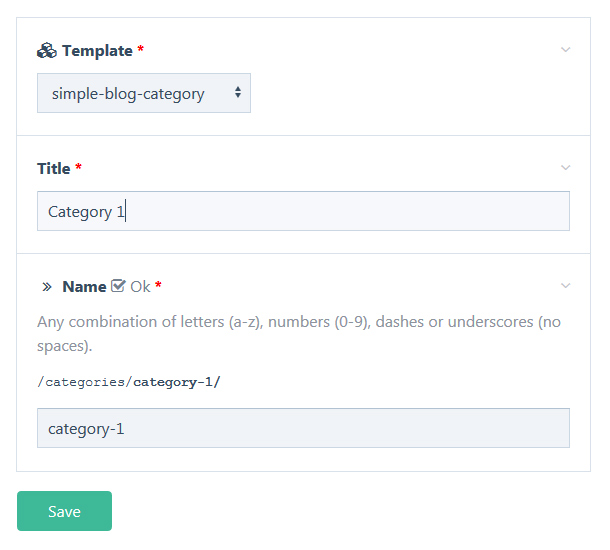
Create your first category
Go back to the "Pages". Move the cursor over the page name "Categories" and click on "New". Select as template "simple-blog-category", enter a title e.g.: "Category 1" and click "Save". On the next page click "Publish".
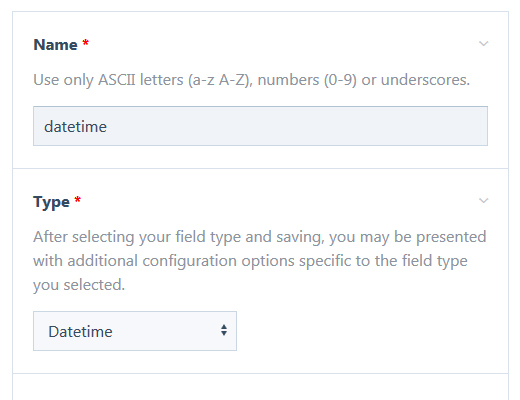
Add a field for the published date
Now we have to prepare the template for the posts. Go to Setup->Fields and click "Add New".

Enter as name "datetime", select "Datetime" as type and click on "Save".
 Go to the tab "Details". As "Date Output Format" select your prefered date format.

Go to the tab "Input", scroll down till "Date Picker" and select "Date/time picker on field focus (recommented)". Click on "Save" again.

Add a field for the categories
Go to Setup->Fields and click "Add New". Enter as name "categories", select "Page Reference" as type and click on "Save".

Go to the tab "Input" and select "Page List Select Multible" as Input field type.
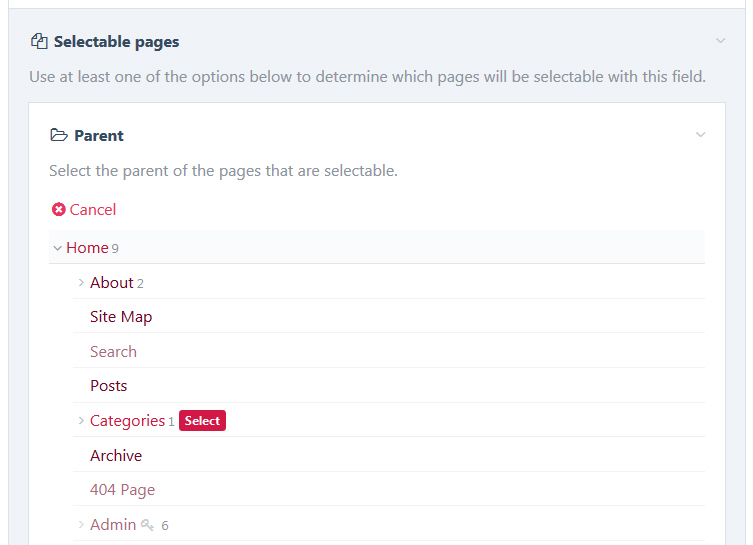
 Scroll down a little bit and select your "Categories" page as "Parent" in Selectable pages. Click on "Save" again.
Add the fields to the templates
Now we have to add the new fields, created above to the template "simple-blog-post". Go to Setup->Templates and click "simple-blog-post".
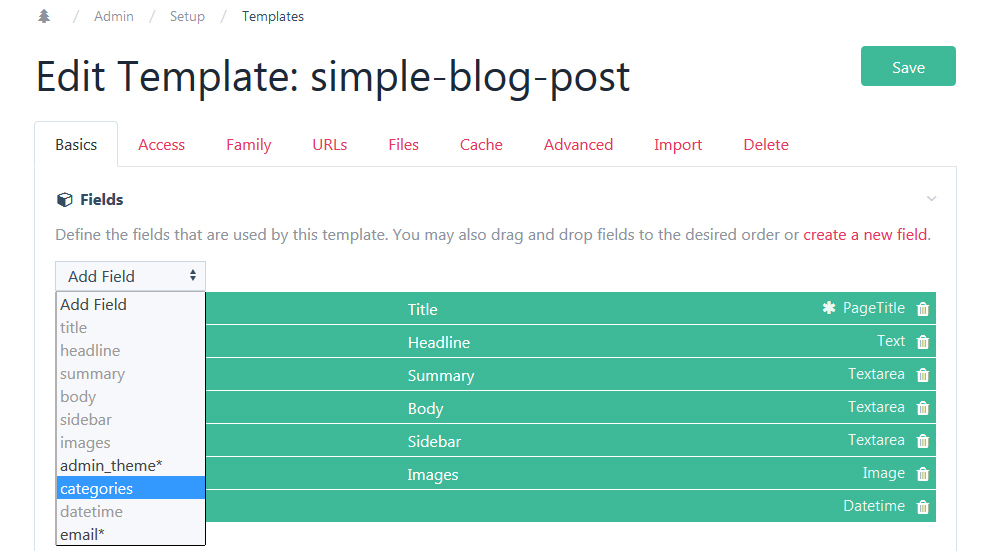
 Click on "Add Fields" and add "Datetime". Click on "Add Fields" and add "Categories". Click on "Save".
Add your first post
Go back to the "Pages". Move the cursor over the page name "Posts" and click on "New".
 On the next page select as template "simple-blog-post", enter a title e.g.: "Post 1" and click "Save".

On the next page scroll down till "datetime", click into the field and select a date you wish shown as publish date.
 Scroll down a little bit more till "categories", click "Add" and add the categories you want.

Scroll to "Images" and click "Choose File" to choose an image which will be shown as thumbnail for this post.

Scroll to "Summary" and enter a description for your article. This will serve as page description as well as teaser for the article.
 Scroll to "Body" and enter your content.
 Don't forget to click on "Publish".
Test it!
Click on "View" on the edit page for the post.
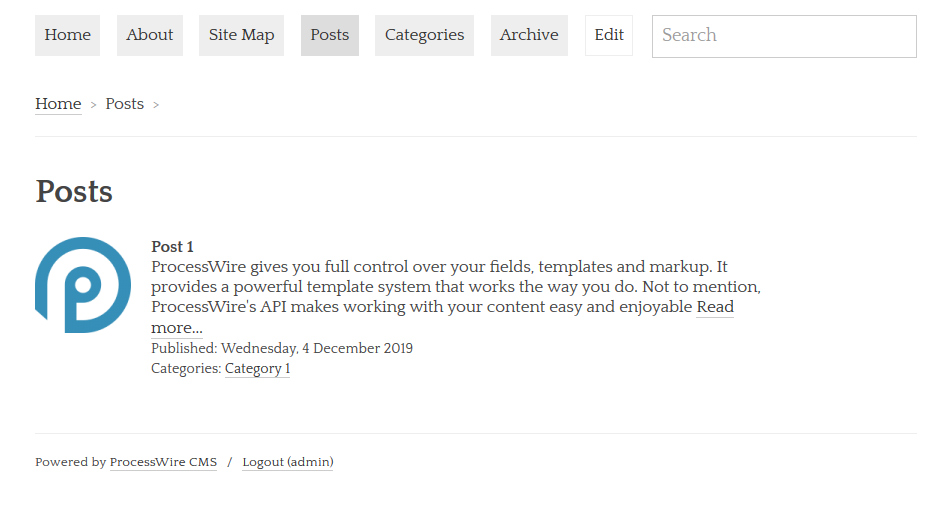
 Click "Posts" in the menu. This page shows a list of all posts. The list is paginated by 10 posts.
 Click "Categories" in the menu. This page shows a list of all Categories.
 Click on a category in the list. This page shows a list of all posts of this category.
 Click on a post in this list. This page shows the post.
 Click "Archive" in the menu. This page shows a list of all posts, sorted by date.


Download:
Change log:
- Version 1.0: Initial version
- Version 1.1: Some improvements
- Version 2.0: Some improvements
- Version 3.0: Equals now Simple blog profile for ProcessWire
Categories: ProcessWire CMS PHP
Comments
Roych 4 years ago
Hello, the link is dead, can those files be uploaded again, thank you!
Radmin 4 years ago
The download link is NOT dead! It might be your browser settings which keep you from downloading.
Roych 4 years ago
You are right, tried with firefox and it works. Thank you ;) Nice simple tutorial btw ;)
admin 4 years ago
Thank you!
Al 3 years ago
It says "Access denied"
admin 3 years ago
Because you use VPN!