CMS ProcessWire
ProcessWire is a free content management system (CMS) and framework (CMF) built to save you time and work the way you do. So you can read it on their homepage. In this article, I want to give newbies a little insight into this CMS to save some of them from the mistake of using WordPress.
Advantages
The biggest advantage of ProcessWire over the widely used WordPress is that ProcessWire offers an incredible flexibility even without any additional third-party modules. Usually only a few lines of PHP are required to implement even unconventional features in the CMS. Another and particularly important advantage is the loading times of the pages. Recently someone published a study in which found was that WordPress is on average the slowest CMS.
The main advantage that many ProcessWire users particularly appreciate is the ability to provide multiple languages for the same page. The correct language in the frontend is determined automatically by the URL. If you explicitly need the multi-language feature, you should make sure that you select the "Multi-Language" profile during the installation process.
Download
This article is now engaged in further with the installation and the first steps. The CMS can be downloaded as a ZIP file from the ProcessWire download page: https://processwire.com/download/core/
There are 2 versions. The master version and the dev (developer) version. The difference between master and dev is described on the download page as follows:
The master version is updated 2-3 times per year, while the dev version is updated almost every week. As a result, the dev version may not have as much testing as the master version, but it will also be the latest/greatest version of ProcessWire.
Upload
In the further explanations on this page I will use the master version. After downloading the ZIP file, we unzip it and load all directories as well as the files index.php install.php and htaccess.txt to the server via FTP. That should look like in the following screenshot:
Don't be worry about these many directories. After the installation process, there will be only one of these "site-..." directories left. They are just standard profiles from which you can choose one during the installation process. I will explain it in the next step.
Installation
The installation process can now be started by calling up the corresponding URL in the browser. You will see a welcome page where you just have to press "Get Started". On the next page you can choose one of the profiles mentioned above. It is very important that you choose a profile that suits your needs. If you only install to try out without multi-language I would recommend to use the Default (Intermediate Edition) profile. Also regarding to the templates, which I described below. Any changes can be made after the installation, but the installation of the multilingual components is somewhat tricky. Therefore I would like to say a short word about the "Multi-Language" profile.
Multi-Language
Let's say you install the multi-language profile and call your homepage, let's say http://domain.com/ then you will see get the default language version of this page which is by default English. If you have installed an additional language, let's say German and you call http://domain.com/de/ then you will get the German language version. If you have a page, let's say "About" below your homepage then you will get the English version for http://domain.com/en/about/ and the German version for http://domain.com/de/about/. But if you want to run your CMS always in only one language then you still have to call http://domain.com/en/about/ for the "About" page.
This means, if you want to design your site multilingual, you also have to install the multi-language profile. If you design your site in only one language, but consider to switch to multilingual later, then installing the multi-language profile is also advisable. If you already know that you use the CMS in only one language, it is advisable to install a different profile but not the multi-language profile. This will save you a lot of work later.
Continue installation
If you only install to try out without multi-language I would recommend to use the Default (Intermediate Edition) profile.
Continue:
- After selecting a profile and click "Continue" the corresponding profile directory will be renamed into "site".
- On the next page, you see a compatibility check. Just click "Continue To Next Step".
- On the next page, you only need to provide the connection details for the MySQL database and click "Continue".
On the next page, you have to provide:
- The URL for the admin login to the admin panel. It's recommended to specify something unique to prevent bots to test your login credentials. The default setting is "processwire" which means that admin panel is accessible under
http://domain.com/processwire/. - Login credentials for the admin account.
- Choose what to clean up. All by default. This will also remove all unused profile directories so that there are only two directories left. Directory "site" for all content related files and Directories "wire" for system related files.
After clicking the "Login to Admin" button, you will be redirected to the admin area, where you will need to provide the login credentials you just specified.
Admin Panel
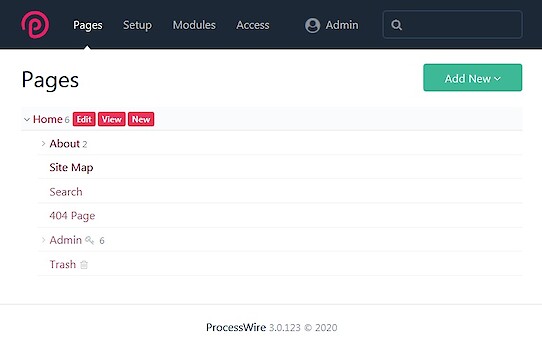
As first you will see the "Pages" page. I can't go into everything in this article. But some first steps. Moving the cursor over the page name (e.g. "Home") will bring up some options. Click on "Edit" will show the page to edit this page.
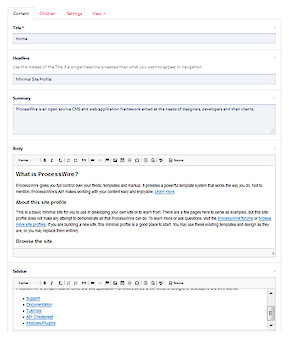
 The tab "Content" shows the fields from which a page consists in ProcessWire. Fields can be added or removed from or to a "Template".
 On the tab "Settings" you can change the "Template".
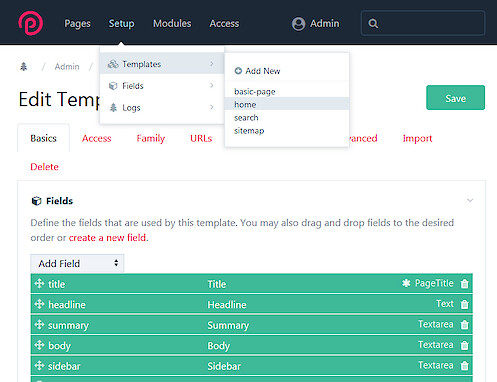
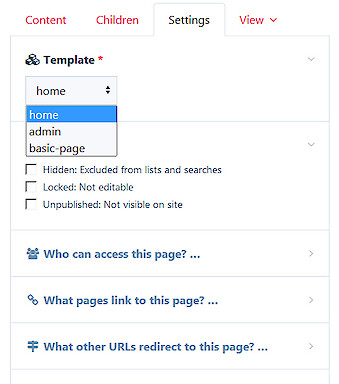 To edit or add a template, go to: Setup->Templates. Here you can see that a page consists of "Fields".
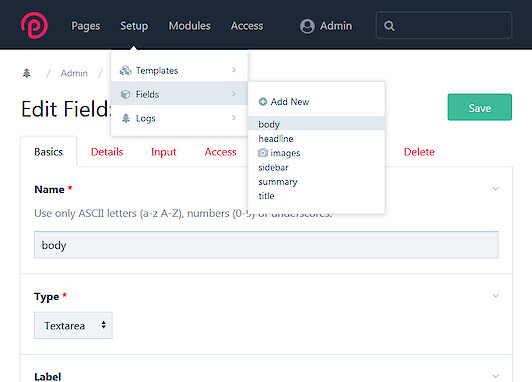
To edit or add a fields, go to: Setup->Fields.
Templates
Templates are usually not edited within the CMS. However, there are additional modules to do this. You just have to go to the directory site/templates/ and open the relevant file in a PHP-editor of your choice. If you have install ProcessWire with the profiles Default (Intermediate Edition), Multi-Language or Regular Uikit, the content will be generated in the template file (e.g. home.php) and stored in a variable ($content) which will be processed in _main.php. The _main.php will generate all the markup. If you use a different method then you have to insert your markup in every template.
Categories: ProcessWire CMS PHP


 Home
Home Posts
Posts Categories
 Archive
 Contact

