Home
Home Posts
Posts Categories
 Archive
 Contact
Simple blog profile for ProcessWire
This site profile for ProcessWire offers a simple and responsive blog which doesn't require any module. It works exclusively with some template files. I published this template files in an earlier post. It also includes template files from my simple search and simple contact form. This blog is almost the same which you visiting here. In another post you can find a multilingual blog profile for ProcessWire.
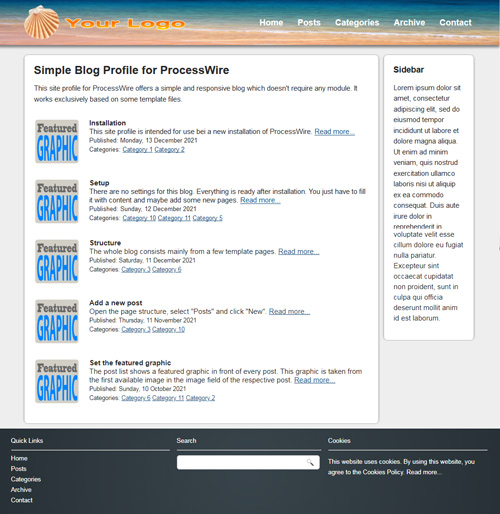
Installation
This site profile is intended for use with a new installation of ProcessWire.
- Download ProcessWire, extract all files and folders and upload it into your web server folder.
- Download the site profile (link at the bottom of this post), extract the "site-simple-blog" folder and upload it into the same folder.
- Start the installation.
- When prompted for Site Installation Profile select "Simple Blog Profile for ProcessWire 3x" and continue with installation.

Settings
There are no settings for this blog. Everything is ready after installation. You just have to fill it with content and maybe add some new pages. The theme can be changed as described below.
Structure
The whole blog consists of the following templates:
- Home page (Template: simple-blog-home)
This page shows the latest 5 posts below the content. - Posts page (Template: simple-blog-posts)
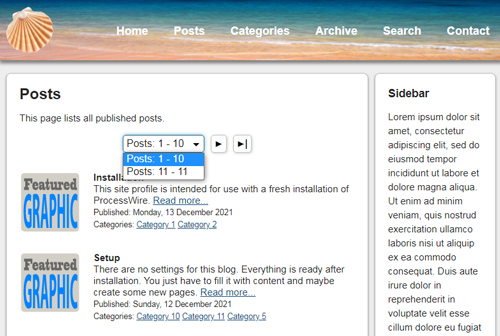
This page lists all published posts. Hidden posts are not listed. Posts are sorted by published date. The latest posts are shown first in the list. All posts are paginated to 10 posts per page. - Post page (Template: simple-blog-post)
This page shows the content and a comment list with comment form provided by the FieldtypeComments which is shipped with ProcessWire. - Categories page (Template: simple-blog-categories)
This page lists all categories which have posts. - Category page (Template: simple-blog-category)
This page lists all posts in this category. Hidden posts are not listed. - Archive page (Template: simple-blog-archive)
This page lists all published posts in a tree structure sorted by published date. Hidden posts are not listed. - Search page (Template: simple-search)
This page offers a search form. - Contact page (Template: simple-contact-form)
This page offers a contact form.
 Add a new post
Open the page structure, select "Posts" and click "New".
 Make sure that "simple-blog-post" is selected as template.

Set the featured graphic
The post list shows a featured graphic in front of every post. This graphic is taken from the first available image in the image field of the respective post. Note that you can change the order of images in the image field by dragging it to another position. The image should have the dimension of 96x96 px.
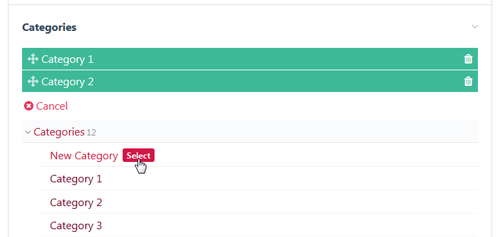
Create and select categories
Before you can select categories you have to create it. Open the page structure "Categories" and click "New".
 Make sure that "simple-blog-category" is selected as template. The page title specifies the category name.

Open your post and click on "Add" in the Categories field and select a category.
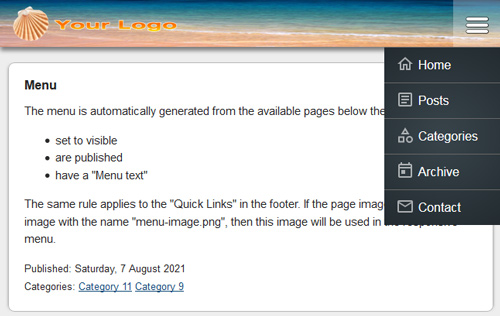
Menu
The menu is automatically generated from the available pages below the root, which are:
- set to visible
- are published
- have a "Menu text"
The same rule applies to the "Quick Links" in the footer. If the page images containing an image with the name "menu-image.png", then this image will be used in the responsive menu.
Sidebars
Each page can have a sidebar regardless of the page type. Just open the page, click in the sidebar field and fill it with content. The sidebar is displayed on right from the body content if the browser window is 700px or wider. If smaller than 700px the sidebar will be displayed below the body content.
Pagination
Posts are sorted by published date and paginated to 10 posts per page.
Contact form
Before you can use the contact form you have to specify the receiver email address. Open the page structure, select "Contact" and click "Edit". Enter the email address in the "E-Mail Address" field. You can also specify a Recaptcha-Site-Key and Recaptcha-Secret-Key to protect the form with Recaptcha.

Theme
The theme can easily customized to your requirement. The header graphic is located in /site/templates/images/header.jpg. This graphic is stretched to the whole header size. The logo is located in /site/templates/images/logo.png. The height of the logo also specifies the height of the header if the browser window is 700px or wider. If smaller than 700px the height is reduced to 60px. The main style is located in /site/templates/styles/main.css.

Download:
Change log:
- Version 1.0.1: Initial version
- Version 1.0.2: Some improvements
- Version 1.0.3: Some improvements
- Version 1.0.4: Contact form uses WireMail instead of PHP mail function
- Version 1.0.5: Improvement for dark theme in Chrome browser
- Version 1.0.6: Improved post pagination
Categories: ProcessWire CMS PHP